
Has the message of “your phone memory is full” ever bothered you? If you have ever thought about how to delete trash on Android, your answer is in the post.
In this post, I shall present you with a list of ways to answer the question of how to delete trash on an Android tablet.
1. Say Goodbye To Your Unused Apps
We tend to install apps for a specific reason but miss uninstalling after the work is over. As a result, your storage space gets piled up with too many applications.
Do the following to get rid of unused apps.
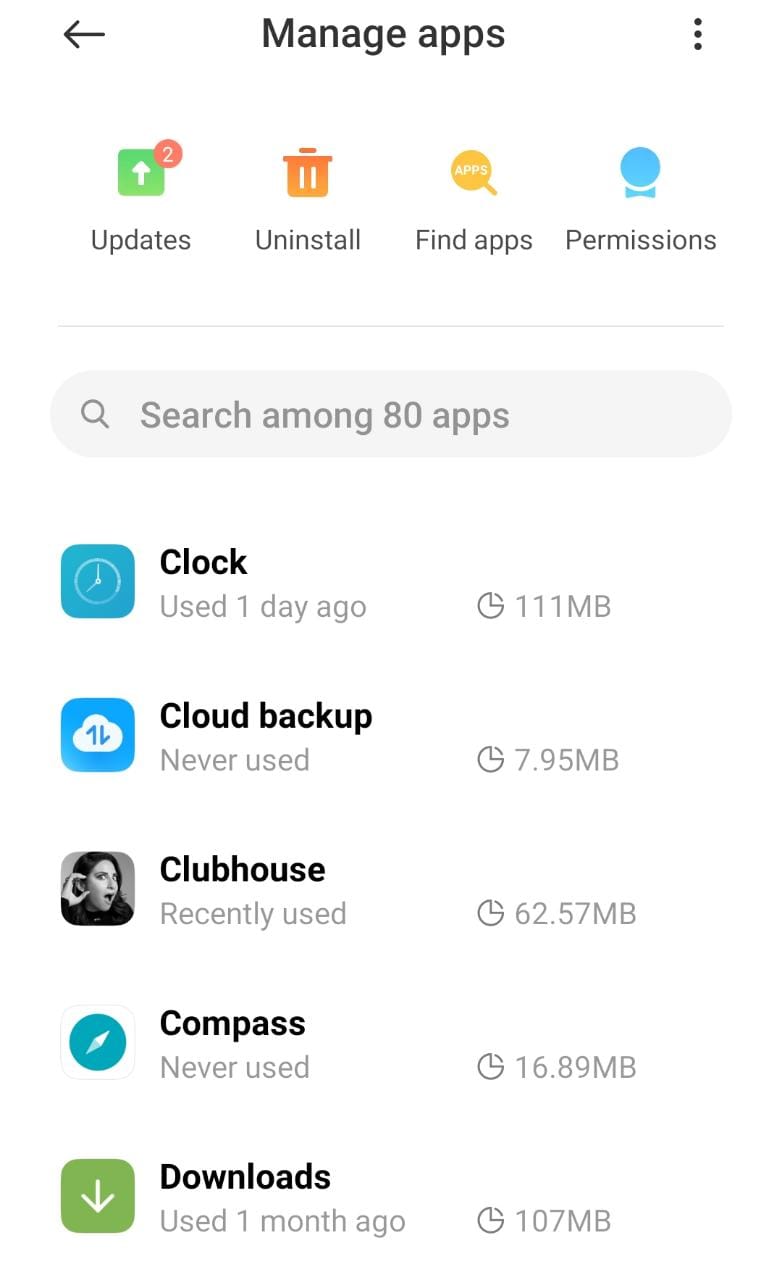
- Tap Settings in your device.
- Move on to Apps section.
- Scroll down to find unused apps.
- Choose the app to be uninstalled.
- Tap Uninstall.
2. Install Recycle Bin App
If you are an organized person in life and want to organize your phone as well, you must think of recycle bin app. The answer to how to empty trash on Android is to install recycle bin where you can find deleted data.
If you are thinking about how to permanently delete trash on Android, simply follow the steps below.
- Hop on to Google Play Store.
- Download Recycle Bin.
- Allow the app to access files in internal storage.
- Open the app.
All that you need to do in this file is to choose files and keep deleting them. They will permanently get deleted in one tap.
3. Clear Cache
I have been thinking for a long on how to delete trash on Android but the best solution I identified and worked out very well is clearing cache.
Follow the steps below to clear cache and get adequate free space in your Android mobile.
- Go to Settings
- Move onto Storage section.
- Scroll down to the section titled “Cached data”
- Choose delete all.
This action will delete cache files associated with all applications. On the other hand, you also have a solution to delete trash for a single application. Follow the steps below.
- Go to Settings.
- Choose Apps.
- Choose the app for which you wish to clear the cache.
- Scroll down to see the option “clear cache”.
That’s it! You get extra space on your mobile now.
4. Make Use Of Smart Storage Option
If you have recently purchased your Android 8 or later versions, you have an easy option to empty trash in a jiffy. The smart storage system eliminates duplicate files from your device and monitors activities from the background.
To enable this option on your device, follow the steps below.
- Go to Settings.
- Tap Storage.
- Press smart storage manager.
Note – Though it runs as a background feature, it does not lower your battery level. So, do not worry about it.
5. Make Use Of An SD Card
There are still models out there in the market with limited internal storage features. In such cases, you may have to connect your phone to an SD card and move files to this card from your existing device.
The biggest advantage of this option is that you can also move applications in addition to files giving you more space on your existing device.
6. Say Goodbye To Downloaded Files
Similar to unused apps, downloaded files often remain untouched but consume so much space. If you think about how to delete trash photos on Android or how to delete trash folders on Android, follow the steps below.
- Go to File Manager.
- Choose internal storage.
- Move to Download folder.
- Choose files you wish to remove.
Note. You can alternatively move these files to an SD card if you do not want them at the moment but need them in the near future.
7. Delete From Google Photos App
You must have had your Gmail account integrated with your device to fasten functions. When you ask how to delete trash on Android, not many would tell the hidden role played by Google Photos app.
Google Photos app is predominant in all our devices and is used as backups. As and when you delete a multimedia file from this application, it adopts Google algorithm where it continues to store deleted files for 60 days after which they are permanently deleted from the device.
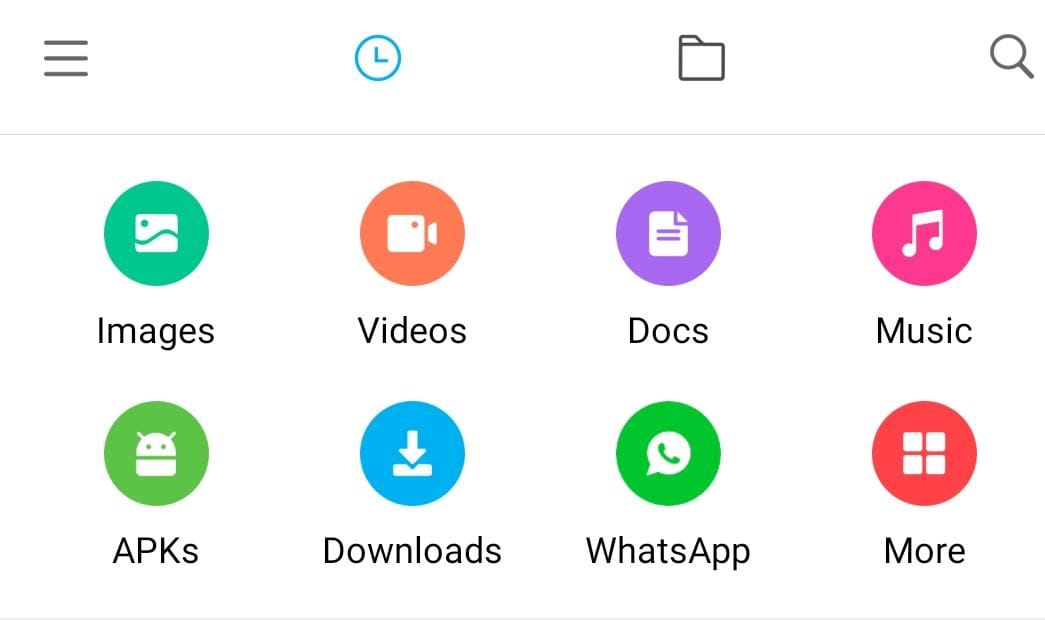
8. Use Google Files App
We have noticed the extraordinary use of the Google Photos section. What about Google Files? If you ask for a reliable way on how to delete trash on Android, I would suggest using the Files by Google application.
There is a clean tab within the same application. This tab gives an option to take a look at all files that are unused or unnecessary to your device. Follow the steps below.
- Press Files by Google app.
- Go to Clean tab.
- Choose the appropriate section “unused app” or “downloaded files”
- Select and delete.
This is yet another interesting and underestimated approach to delete trash on your Android device.
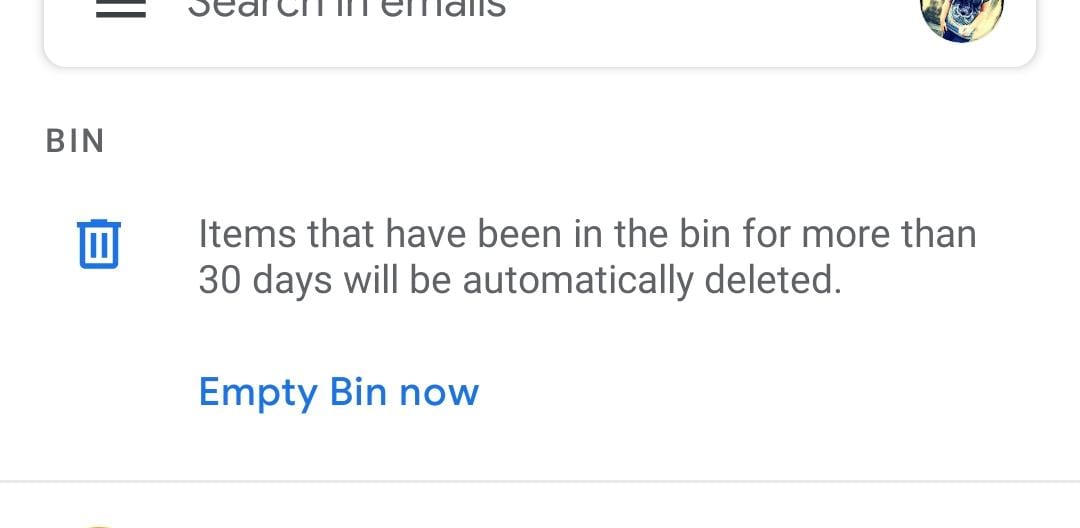
9. Delete Trash From Gmail
Every application generates trash that you need to clean regularly. On one hand, it accumulates cache files. On the other hand, you need to know how to delete trash folder on Android.
Emails in the trash folder of Gmail are stored for a month after which they get deleted. When you are running short of storage space, follow the steps below.
- Tap Gmail application.
- On the left, scroll down to Bin/Trash option.
- Delete unwanted emails. Alternatively, you can choose Empty Trash Now to delete all files in one go.
Conclusion
It is extremely easy to remove unnecessary files on your phone and use multiple options to permanently trash files on Android. As an Android owner, each one of us should be aware of basic aspects like caching, downloaded/unused files, unused applications, and trash folder associated with applications be it Gmail or Dropbox, or Google Photos.
All you need to do is to hit that delete button and you are done with deleting files to get extra space. Stay organized and allow your device to be trash-free too! I hope it is a useful post to delete trash on Android. Share your viewpoint in the comment section!
Madam thank you for this info. After reading this a realized how possible it is that many people actually don’t know how to deal with deleted files from their devices.